A small-shop miter saw station needs space for more than the saw itself. It must accommodate the machine’s movement, support the material you cut, and leave room for the operator, clamps, and dust connections.
Start with your actual saw and typical projects. Measure the operating setup before building cabinets or deciding how close the station can sit to a wall.
A permanent station can make frequent crosscutting convenient. A portable or folding arrangement can preserve floor space when the saw is used less often.
Affiliate disclosure: This article contains affiliate links. If you purchase through these links, we may earn a commission at no additional cost to you.
Planning your saw station alongside the rest of the workshop? Explore Ultimate Small Shop as an additional planning resource.
Decide Whether You Need a Permanent Station
Before dedicating a wall to the saw, consider how often you use it.
A permanent station may suit frequent crosscutting of boards and trim. An occasional user may benefit more from a compatible portable stand that stores between sessions.
Ask:
- How often will I use the saw?
- What lengths of stock will I normally cut?
- Do I need repeat-length cuts?
- Can the operating area remain available?
- Will a fixed station reduce essential assembly space?
If you are still deciding whether the tool belongs in your setup, read our guide to whether a small workshop needs a miter saw.
Measure the Saw in Its Operating Positions
Use the manual for your exact model and version.
A saw’s stored dimensions may not describe the space needed during cutting. Sliding mechanisms, handles, fences, and dust connections can extend beyond the base.
Record these requirements before designing the station:
| Feature | What to check |
|---|---|
| Base and mounting | Footprint, mounting points, and approved securing method |
| Sliding mechanism | Full front-to-back travel |
| Miter movement | Rotation of the table, handle, and associated parts |
| Bevel movement | Clearance as the head tilts |
| Fence adjustments | Space to reposition components as instructed |
| Guard movement | Unobstructed operation throughout the intended cut |
| Dust connection | Hose movement, bends, and access |
| Operator area | Position needed to handle stock and reach controls |
With the machine disconnected, check movement as directed by the manufacturer. Keep hands clear of the blade and other pinch points.
Do not use a powered cut to discover whether the saw collides with the station.
Plan Station Depth Around Full Saw Travel
A sliding miter saw may require considerable space behind its base. Other designs manage travel differently, so avoid using a generic station depth.
Check the saw at the positions required for your intended operations.
Include the dust hose. A rear connection that fits when the saw is parked may bend sharply, pull loose, or strike the wall when the head moves.
Also check the front projection. A handle or sliding assembly may extend into the operator’s area or a nearby passage.
Avoid building a tight enclosure first
A close-fitting cabinet or dust enclosure can restrict movement even when the saw appears to fit at a straight setting.
Establish the complete operating space first. Design surrounding storage afterward.
For the relationship between this station and other tools, see our small woodworking shop layout guide.
Reserve Space for Stock on Both Sides
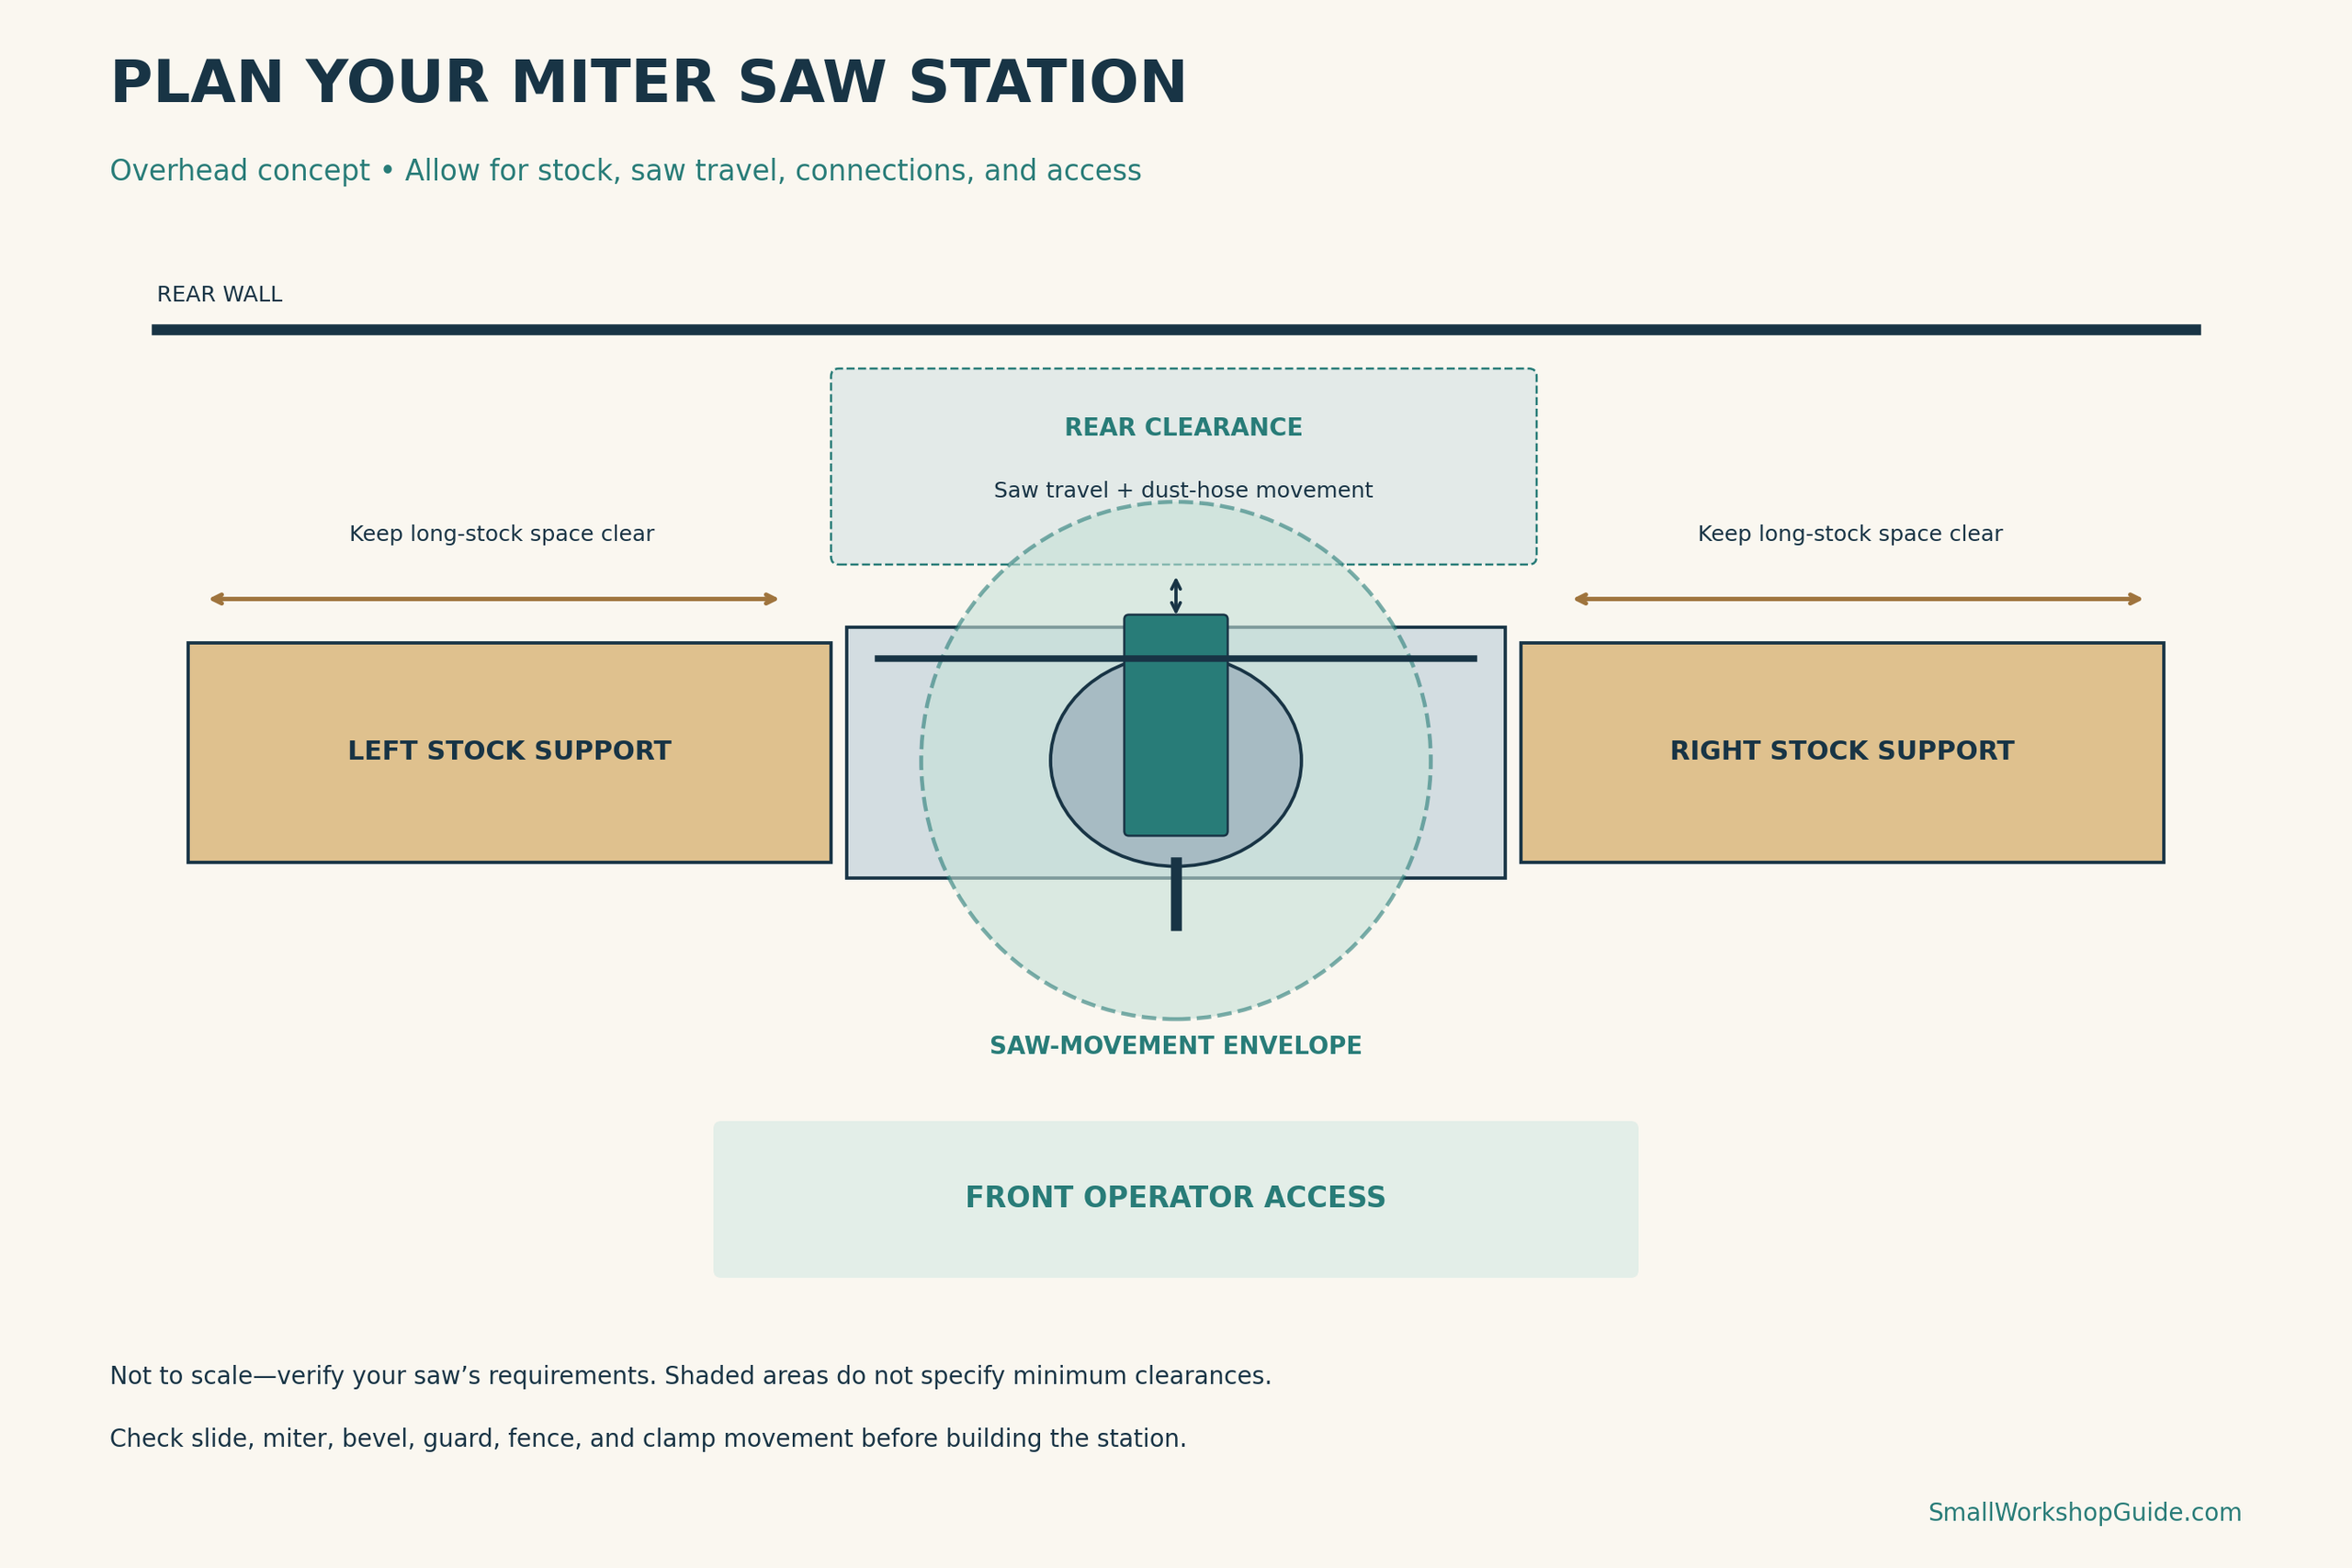
Miter saws cut across material that usually extends sideways along the fence.
The useful station width therefore depends on the material, not simply the saw’s base.
Consider several common cuts. A board being trimmed near one end may extend much farther on one side than the other. A different cut may reverse that arrangement.
Distinguish support length from clear stock space
Support wings do not necessarily need to extend beneath the entire board. However, the arrangement must support the material appropriately throughout the operation, following the equipment instructions.
The surrounding space must also remain clear wherever the stock extends.
A tall cabinet beside a short support wing can prevent a long board from reaching the saw, even though the support itself appears adequate.
Keep the supported material properly seated
Set supports according to the saw and stand instructions so the workpiece rests as intended on the saw table and against the fence.
A support that lifts one end or allows it to drop can interfere with positioning and control.
Our infeed and outfeed support guide explains general checks for support height, alignment, and stability.
Compare Fixed, Portable, and Folding Stations
| Station type | Potential benefit | Main tradeoff |
|---|---|---|
| Fixed cabinet station | Convenient regular use and integrated storage | Permanently occupies wall and floor space |
| Compatible portable stand | Can move or store between sessions | Requires deployment and setup checks |
| Fixed base with folding wings | Reduces stored width | Wings need dependable support and locking |
| Removable mounting arrangement | Allows a suitable surface to serve other tasks | Requires safe handling and secure installation each time |
Fixed cabinet station
A fixed station can combine the saw, stock supports, and storage.
Keep the support surfaces clear. Drawers underneath may be useful, but their doors and handles must not interfere with your working position.
Make mounting and service access part of the design rather than enclosing the saw so tightly that adjustments become difficult.
Portable stand
Check compatibility with your saw, mounting brackets, stock supports, and load requirements.
Include the stand’s complete deployed footprint. Legs can occupy more floor space than expected.
Plan a storage position and a practical route between storage and use.
Folding wings
Folding supports can reduce the station’s width when stored.
Their hinges, braces, and locks must suit the intended use. A wing that folds neatly is not necessarily stable under material loading.
Check the deployed arrangement before every session, especially if the station has moved.
Comparing a permanent station with a setup that packs away? Take a look at Ultimate Small Shop while developing your workshop plan.
Include Dust Collection Before Building Cabinets
Miter saw station dust collection needs space of its own.
Start with the saw’s extraction connection and the manufacturer’s instructions. Account for the hose, access for connection and cleaning, and movement during miter and bevel adjustments.
Do not assume that enclosing the rear of the saw will automatically provide effective capture.
Check the complete movement inside any hood
A hood or surrounding enclosure must not interfere with:
- The sliding mechanism.
- Blade guard movement.
- Fence adjustments.
- Bevel travel.
- Clamps or workpieces.
- Controls and maintenance access.
A design that works only at a straight cut may be unsuitable for your other intended operations.
Preserve access for cleaning
Avoid creating inaccessible pockets behind permanent panels.
The station should let you inspect and clean relevant areas without dismantling major furniture each time.
For a fuller discussion of capture challenges, read our sanding and miter saw dust collection guide.
Plan Clamping and Fence Access
Leave room for the workholding devices specified for your saw and operation.
A storage wing, raised back panel, or accessory fence can interfere with clamps. Check these components with representative stock in place.
Some bevel operations require fence adjustments. Follow the saw’s manual and verify that the station allows the prescribed movement.
Do not remove guards or required components to make a station design work.
Treat repeat-cut accessories as a separate setup
If you intend to add a stop system, use an arrangement suitable for the saw and operation.
Its position must not trap material or interfere with workholding and blade movement. Follow the accessory instructions rather than improvising a fixed block based only on convenience.
Confirm the setup with the machine disconnected before use.
Position Storage Without Blocking the Work
Under-station storage can be useful for measuring tools and appropriate accessories.
Keep frequently used items accessible from the normal working side, while ensuring drawers do not obstruct your stance.
Avoid placing tall storage directly in the long-stock path. Also check overhead shelves against the saw head, raised handle, and the movement needed to bring material into position.
A tidy station should not require unloading shelves before every long cut.
Consider How Material Reaches the Saw
The stock must reach the station before it can be cut.
Check the route from storage or the entrance. Can a long board turn into position without striking another tool, a light, or a doorway?
Allow somewhere suitable for material waiting to be cut and for completed parts. Do not let these piles occupy the support surfaces required for the next operation.
If the room is shared, consider whether someone opening a door or walking past could enter the stock-handling area.
Keep exits available throughout the setup.
Test the Station Before Making It Permanent
Use a scale drawing or floor tape to establish the proposed footprint.
Then check the saw, supports, and representative stock in their intended positions.
With the machine disconnected and following its instructions, confirm:
- The saw is secured using an approved method.
- Intended slide, miter, and bevel movements remain clear.
- The guard operates without interference.
- Stock rests on suitable supports.
- Clamps and fence adjustments remain accessible.
- The dust connection moves without snagging.
- Controls and exits remain available.
Test more than the most common straight-cut position. Your station should accommodate every operation you intend to perform there.
Common Planning Mistakes
Using the stored dimensions
A saw can fit when folded or locked for transport yet require substantially more room during use.
Building the station before choosing the saw
Different models have different table heights, mounting points, and movement requirements. Verify the actual equipment before finalizing the design.
Treating support wings as shelves
Stored tools and materials can prevent stock from resting correctly. Keep the required support area available.
Making the dust enclosure too tight
An enclosure must allow the saw and accessories to move through the intended range.
Forgetting the portable setup routine
A movable station still needs checks for stability, alignment, connections, and clearance whenever it is deployed.
Frequently Asked Questions
How deep should a miter saw station be?
Use your saw’s complete operating dimensions, including travel, controls, and the dust connection. There is no universal station depth.
Does the saw need to be centered between equal-length wings?
Not necessarily. The arrangement should suit your typical material and cuts while providing appropriate support on both sides as needed.
Can a miter saw station go in a corner?
Possibly, but adjacent walls often restrict long stock. Test the actual board positions and all intended saw movements.
Is a portable stand suitable for regular use?
It can be, when compatible with the saw, properly deployed, and appropriate for the material and operation.
Can I build storage above the station?
Only where it does not obstruct equipment movement, stock handling, lighting, or access. Check the saw in its operating positions before installing shelves.
Build Around the Saw and the Stock
A useful small-shop miter saw station accommodates the machine’s movement, supports the material, and leaves controls and workholding accessible.
Measure first, compare fixed and portable arrangements, and include dust collection in the design. Test the intended operations before committing to permanent cabinets.
Ready to develop the rest of your workshop plan? Explore Ultimate Small Shop here.